This is all that is left of the Infamous NergHogs Website!
We no longer breed or sell Hedgehogs!
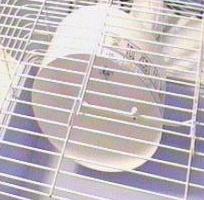
You need:
1 - 5 gallon bucket
1 - 1.5" nylon roller (shower or patio door wheel)
1 - 2" long 1/4" machine screw
1 - 1/4" wing-nut
3 - 1/4" nuts
4 - 3/4" long #6 machine screws
4 - washers for a #6 screw
4 - lock nuts for a #6 screw
2 - 1 1/2" washers
2 - 2" washers

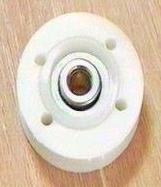
At a hardware store, find a 1.5" nylon roller wheel (look for a replacement wheel for a shower or patio door), this will have a ball-bearing roller in it. Get a 2 inch long 1/4 inch diameter bolt or machine screw and 3 nuts to fit it. Also get 4 3/4" long #6 machine screws and 4 washers and locking nuts to fit them.
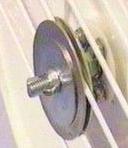
Imagine a square in the nylon roller and drill 4 holes at the corners of this imaginary square with an 5/32" drill bit. (See picture above)
Drill 4 coresponding holes in the bottom of the bucket. Use a small mark to keep the orientation of the holes right. (See picture on the right)
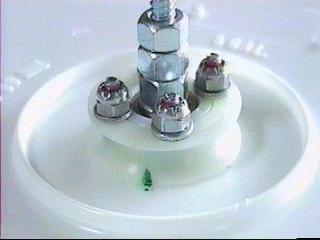
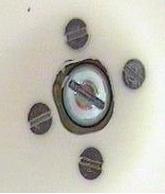
Then push the 2" screw through from the inside of the bucket to the outside and put the 3 bolts on and tighten them as much as you can.
The head of the screw must not touch the plastic bucket. It will cause drag. Use a knife to clear away any plastic that might be touching it.
Note, this assumes that the WIDTH of the wall is 1/4" or less. If the wall is thicker, increase the length of the 2" long 1/4" screw as needed.

- Instead of a bucket, use a cake cover. You can find one at Wal-Mart or Kmart for around $8. These tend to be 12" to 13" in diameter instead of the 10.25" that the buckets are. The only reason I don't do this is because of the additional cost.
- Using duct tape, line the track of the wheel. When it gets messy just pull off the tape and put on new. It also provides traction for those hogs that need it.

|
Making a Hanger:
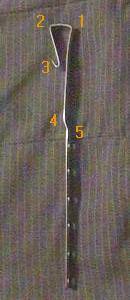
(Extra Parts: 1 - 15" long, 3/4" wide, 1/16" thick aluminum strip) Bend the aluminum strip as shown in the picture on the right. The numbers reflect the order that I bent them in. Feel free to do it in whatever order works best for you. I used a vice, pliers, and my hands. Drill the 5/16" mounting holes in the center of the strip, I used a distance of 1.25" between holes. Sand the drilled area smooth and get rid of any sharp spots. See the picture to the left Push the shaft through the front opening of the strip at the HEIGHT that you want. Tighten the whole assembly on with the remaining 1/4" nut. |
|
(Extra Parts: 3 - washers for a #6 screw, 3 - lock nuts for a #6 screw, 3 - 2" long #6 machine screws, 1 - 11.5" long, 3/4" wide, 1/8" thick steel strip, 1/2 - patio or walkway brick)
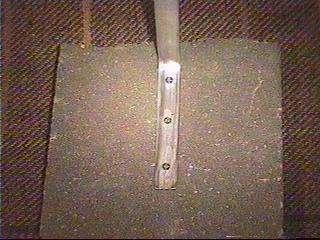
Bend the steel strip as into an 'L'. Make the long end approximately 7". Drill a 5/16" hole in the center of the long end, approx 1/2" from the end.
Then drill 3 5/32" holes in the shorter end; see the picture to the right.
If you are using a long brick, break it in half. I use ones that are approximately 8" wide by 16" long, so it breaks to around 8" square.

Push the shaft through the front opening of the 'L'. Tighten the whole assembly on with the remaining 1/4" nut (or the wingnut).
© 1999-2007 Doyle M. STRadling, doyle@nerg.net , All Rights Reserved.
